9.30.2013

The Cowl Shawl | Crocheted

Today's post may seem familiar to you and it should. Last week I shared a smaller version of this 'Cowl Shawl' and today we're talking big.


I call it a shawl rather than a scarf because it can be pulled over the shoulders and also even doubled around the neck. I've also added two buttons to this one for more versatility. Below are the instructions and my sketch, which I used as a guide:


Chain 150 and join with a SL ST to make a ring.
DC all the way around into the ring.
End each row with a SL ST and start the new row with CH 3 [this counts as 1 DC].
You need a total of 41 rows.
This is the order I have my colors in [top to bottom]:

1 row SC GREEN | 3 rows DC GREEN
4 rows DC BROWN | 8 rows DC YELLOW | 4 rows DC BROWN
3 rows DC GREEN
4 rows DC BROWN | 8 rows DC YELLOW | 4 rows DC BROWN
3 rows DC GREEN | 1 row SC GREEN

I've added an extra rim with single crochets onto the first and last row for a more finished look.
If you are new to crocheting, check out this helpful page.


I ended up using about two balls of each color yarn.

I also used little markers at the end of each row, there were some boo-boos when I didn't.

It is super comfy, cozy and really kind of a statement piece. This is also just one of the ways it can be worn; Adding buttons let's you wear it a different way every time.

Happy Monday Dolls, stay warm =]


9.27.2013

High Five For Friday!!!

Hello Dolls! Hope you all had a great week. Mine was pretty awesome. We met up with some old friends and made some new ones. Got the green light to pack for home. Explored the Peruvian wine country and as always, we ate some great food.


  • 1. My favorite cafe is now selling homemade English Muffins! They are a bit pricey @ $4.50 for a bag of 4, but so worth it.
  • 2. While getting the muffins, Brian and I sat down for some coffee and shared a Nutella cupcake. [both 1 and 2 happened before I decided to give up gluten]
  • 3. Our good friend Chan came back to visit Peru, he worked with Brian on the project down here, but had gone home a few months earlier. We went out to dinner with him, Andy, Jules and Abe at a place called Panchita.
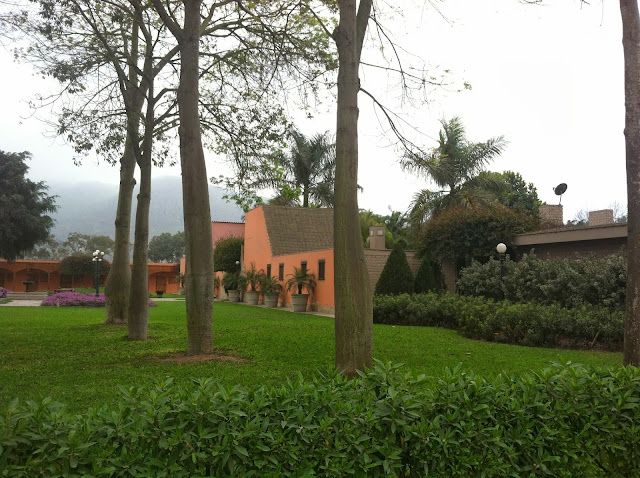
  • 4. This is a shot of the vineyard we visited in Pachacamac, what a great afternoon that was. Check out that trip here.
  • 5. Yesterday I hung out with Tanya and Miranda and had a blast. We went to lunch, did some souvenir shopping and ended up at this quirky bar where we had Cholopolitans [Cosmopolitan, but with pisco, of course] and boozy Passion Fruit slushies with condensed milk. Hahaha I know, it's weird! But when in Rome...
This week I'm linking up with:
Lauren @ The Lauren Elizabeth
Jennie @ The Diary of a Real Housewife
Darci @ The Good Life Blog
Happy Friday Friends!!!

9.26.2013

mini apple pies | with honey

Hello Darlings! I'm going gluten free for awhile in hopes to get rid of my chronic spring/hay allergy. I wanted to go out with a bang so for my last gluten including meal I made these Mini Apple Pies with Honey. I really hope my allergy goes away, but I also really hope I can have those again.
They are DELICIOUS!


Mini Apple Pies with Honey

Ingredients
2 medium apples, peeled and diced
1/4 cup of honey
1/2 tsp cinnamon
1/4 tsp nutmeg
a good pinch of salt
1 egg yoke
sugar for sprinkling
2 refrigerated 9" pie crusts
some flour for rolling

Tools
rolling pin
3" round cookie cutter

Method
  • Preheat oven to 350 degrees F. Line a baking sheet with parchment paper and grease it a bit.
  • Add apples, honey, cinnamon, nutmeg, and salt to a bowl and mix until apples are coated.
  • Unroll the pie crusts on to a floured surface and cut out 3" rounds. Roll the scraps and cut out more rounds. You should have about 24.
  • Take your 3" round and roll them out to about 5". Be careful not to roll them too thin.
  • Divide the rounds into two piles. Tops and bottoms.
  • Brush the edges of the "bottoms" with water and place a spoonful of apple mixture in the center of each.
  • Make a small slit in the center of the "tops".
  • Add "tops" to "bottoms" and seal the edges together by folding them over with your fingers.
  • Brush tops with egg yoke and sprinkle with sugar.
  •  Place pies on the sheet and bake about 20 minutes, or until golden brown.


Happy Tasty Thursday Dolls!!!

9.25.2013

freebie // wrap address label

 You guys! Hi! I've been wanting to share with you another label and I'm finally doing it. This one is hot off of Photoshop =] haven't even had time to print it yet.


This is another wrap around address label. It measures 7.25" x 2", similar to the wedding one. There are two versions of today's freebie. They both also come in teal and pink. Of course, when you send them out the address part will be hand written, but you get the point.


Below are previews of the downloads and how to get them:

To download pink, go here.


To download teal, go here.

Happy Wednesday Friends!!!


9.24.2013

Cozy Cowl Scarf | Crocheted

 Hello Darlings! Fall is here and soon it will be scarf season!!! Oh, yeah! I love scarves. I had a boss once, who would joke and say "Surprise, Mariya's wearing a scarf again!". Today I'm sharing with you one of my latest crochet attempts. This one is very basic and also makes for a great gift!


This is the sketch I used as a guide for the scarf. I used a rather thin yarn, but I'm not sure about the exact thickness. I got the yarn at the local farmers market, it is organic, naturally dyed, sheep's wool. It is so natural, it actually had little sticks in it =]. I also used a 5.50 mm crochet hook.


Chain 115 and join with a SL ST to make a ring.
DC all the way around into the ring.
End each row with a SL ST and start the new row with CH 3 [this counts as 1 DC].
You need a total of 49 rows.
This is the order I have my colors in [top to bottom]:

1 row SC GREEN | 5 rows DC GREEN
3 rows DC BROWN | 3 rows DC PINK | 3 rows DC GREEN
6 rows DC BROWN
3 rows DC PINK | 3 rows DC GREEN | 3 rows DC BROWN
6 rows DC PINK
3 rows DC GREEN | 3 rows DC BROWN | 3 rows DC PINK
5 rows DC GREEN | 1 row SC GREEN

I've added an extra rim with single crochets onto the first and last row for a more finished look.
If you are new to crocheting, check out this helpful page.


TA-DA!!! You've got yourself a scarf! Also, a big THANK YOU to my lovely model, Tanya =] she's the best! Check out her fun travel blog here.

Happy Tuesday Darlings!!!

9.23.2013

Winery Tour | Casa Hacienda Queirolo


  Darling Dears! I had and amazing time last Friday on our winery tour in Pachacamac! What a wonderful place and an amazing experience it was. We met some great people and drank some awesome wine and pisco. I loved being out in the country side, in the foothills of the Andes breathing fresh air for a change =]! Oh it was a hoot and a half!

The winery was on the grounds of Casa Hacienda Queirolo and the wonderful Edwin from Haku tours took us there. These are some picture that were taken along the way.


After the tour Edwin took us to a lovely restaurant near by called La Gloria Del Campo. It was again, amazing! Afterwards we took some silly pictures pretending to smell the Devil's Breath, which grows everywhere here.


What a day!
Happy Monday Friends!!!

9.20.2013

High Five For Friday!!!

My favorite day is here again!!! Today is specifically exciting, because I'm going wine tasting with Tanya and her friend Miranda, who is visiting from Canada! This is my first visit to a Peruvian winery, so let's hope for the best hahaha! Fingers crossed, kay!?


1. New Girl season two is on Netflix and I've been watching back to back episodes like a crazy person! She's got some hot hair, wish my bangs were that cool.

2. Over the weekend we went out for brunch with a few friends and guess what? There was a chocolate fountain!!! OMG!!! I dipped everything I could in it and then had some more stuff...It was epic!

3. While on my usual wander with Jules, to lunch, I found this gem. You guys, I'm in love with this coat!!! It's alpaca and all hand stitched detail...and it's just under $500, yeah! That's not happening.

4. On the up side I made some mini apple pies, super amazing! Watch out for the recipe next week, they're pretty healthy too! Well pretty healthy for pie.

5. Last but not least...HOT NUTELLA! Brian wanted to have it too, after I kept talking about it last week. So we went. Best hot, liquid yumminess ever! They know how to make you fat in Peru, land of carbs and chocolate =]

On an even more personal note, I don't always just talk about food and clothes. I promise. I just haven't done much lately =]

This week I'm linking up with these lovely ladies:
Lauren @ Lauren Elizabeth
Jennie @ The Diary of a Real Housewife
Darci @ the good life blog

Happy Friday Friends!!!

9.19.2013

Tasty Thursday // Goat Cheese Quiche | Sweet Potato Crust


One thing that I gladly take away from our Peru trip is that I've started cooking so much more and from scratch. It is so easy and so much better for us. Really how hard is it to boil some chick peas and make your own hummus. It's not hard at all. I can also proudly say that we have not bought canned anything in over eight months!!! Anyway. Over the past year and a half, I've made some really tasty and I have to admit intimidating recipes. Most turned out amazing and some less so, but you cook and you learn, right?!=] This is one of the best ones, Goat Cheese Quiche with Sweet Potato Crust. Delicious and HEALTHY!!!


Goat Cheese Quiche with Sweet Potato Crust
adapted from Farmgirl Gourmet
Serves 8 [158 clas.] - 12 [105 cals.]

the Crust
two medium sweet potatoes [yams]
1 egg
2 tsp salt
1 tsp black pepper
a pinch of red pepper flakes

the Filling
5 eggs
5oz softened goat cheese
4-5 green onions [sliced thin]
1 cup of Greek yogurt
1/4 tsp salt
1/2 tsp pepper
1/2 tsp Italian seasoning

  • Preheat oven to 450 degrees F. Grease a 9" pie dish and set aside.
  • Peel and grate sweet potatoes on a large holed box grater. Add grates potatoes to a large piece of cheesecloth or a thin kitchen towel, gather corners and squeeze out excess water over the sink.
  • In large bowl whisk together 1 egg, 2 tsp salt, 1 tsp black pepper, and red pepper flakes. Add grated sweet potatoes and mix until coated. Next press mixture into the bottom and up the sides of the prepared pan. Place on a cookie sheet and bake for 30 minutes. Remove from oven and let it cool down a bit.
  • Turn oven down to 375 degrees F.
  • While crust is cooking add 5 eggs, goat cheese, green onions, 1 cup Greek yogurt, 1/4 tsp salt, 1/2 tsp black pepper, 1/2 tsp Italian seasoning to a large bowl and mix until combined.
  • Press the sides of the crust back, if they have moved away from the pan. Add egg mixture to pan and bake for 30 minutes.
  • Turn oven down to 350 degrees F and bake for another 15 minutes.
  • Take the pan out of the oven and allow to rest for 20 minutes after serving.


So this is it, fairly easy to make and very tasty!


No real reason why I added this shot, besides I really kinda like it =]. Wish my pie dish was white though. Today I'm liking up with Anne @ Domesblissity

Happy Tasty Thursday Friends!!!