

welcome.welcome.welcome! (oh.Effie.Trinket)
I present to you the-oh-so-anticipated PAPER BEADS!
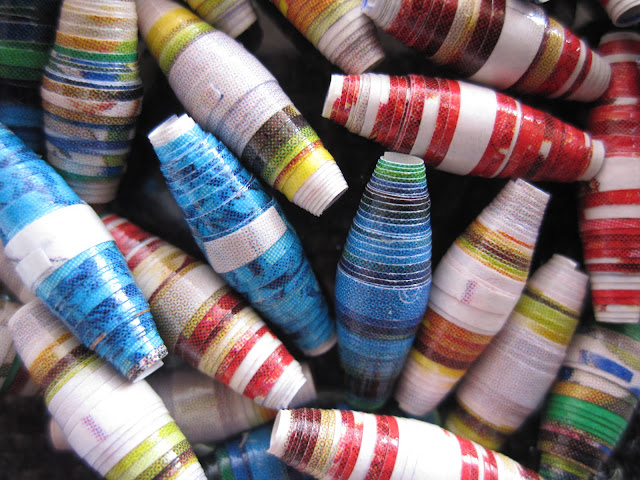
I love paper beads. They are shiny and colorful and most importantly, they are made by me! So they are just that much extra special
 |
| a wee portion of my bead.collection |

First! Gather your papers! I usually look through all kinds of magazines, catalogs and news papers. Once you have found THE ONE, flip it over and grab your other supplies: ruler, pen or pencil, round toothpicks, white school glue, scissors, clear nail polish (yes, that's right), and something to stick them on, to dry (I used a styrofoam tray)

Take your ruler, starting from the bottom right corner and measure 1cm. Make a mark.

Then line up that mark (using your ruler) with the top edge of the page and draw a line.

Now for the next one, measure 1 and 1/2 cm on the top side, where you connected the first line. Then draw another line going down to form your first triangle. Continue this way until you have as many triangles as you need, or until you run out of paper.

It's time to cut them up! Use sharp scissors and follow the lines. If I had a rotary blade it'd be much easier, but they don't sell those in Peru. I'm just gonna have to wait until I'm in Seattle.


I flipped them over and look how pretty they are!

Getting carried away with the pictures here (= Take a toothpick and a triangle. Good side out, place the triangle under the toothpick and roll.it.


When you get to the end, dab some glue on the very tip of the triangle, roll it up and smear the excess glue over the entire bead.


Now stick it on the styrofoam tray and let it dry. I wait about 30 minutes... if I can.

Continue on until you have them all rolled and on the tray. When they are dry, take the clear nail polish and brush it all over the bead. Stick it on the tray again and let dry for another 30 minutes.

Take them off of the toothpicks by gently sliding them off. Put them in a glass jar and take a ton of pictures! Or at least that's what I did.


I just love how shiny they are! Stay tuned for a.paper.bead.necklace.tutorial real soon!
P.S. madmim is where I first fell in love with paper.beads
love these! you are so creative! can't wait too do crafts with you when you're home!
ReplyDeleteMichelle
Awe thank you honey! I can't wait to see you!
ReplyDeleteVery interesting creation mama!
ReplyDelete